How To Draw a Butterfly. Step by step Drawing Lesson for kids.
In this drawing lesson we’ll show you how to draw a Butterfly in 9 easy steps. This step by step lesson progressively builds upon each previous step until you get to the final rendering of the Butterfly.
Here are some interesting facts about the Butterfly you might find interesting.
The butterfly has four stages in its life cycle: egg, larva, pupa and adult. Butterflies have large, often brightly coloured wings, and conspicuous, fluttering flight. Butterflies exhibit polymorphism, mimicry and aposh1atism. Some butterflies migrate over long distances. Butterflies feed primarily on nectar from flowers.In 9 steps we show you how to draw this beautiful Butterfly with it’s wings fully expanded. Follow each step, sometimes printing the page helps. You can even trace the final Butterfly rendering if it helps you!
Step 1: Draw an oval to represent the beginning the body section.

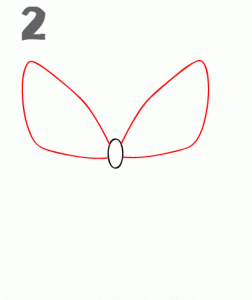
Step 2: Draw in the upper wings.
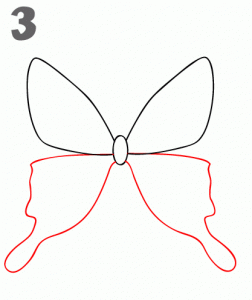
Step 3: Draw the lower wings following the red outlines.
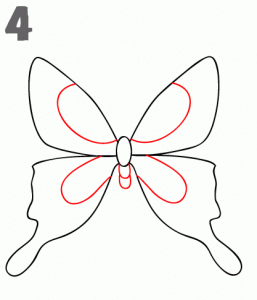
Step 4: Sketch the inner wing details.
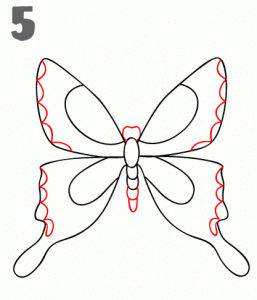
Step 5: Add the outter wing details, draw a few more details to the body and don’t forget to finish the head.
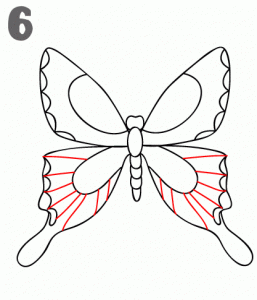
Step 6: Draw in more details to the lower wings.
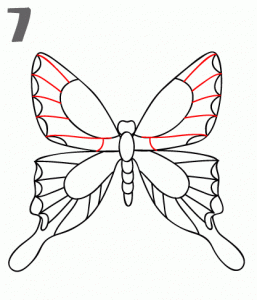
Step 7: Draw in more details to the upper wings.
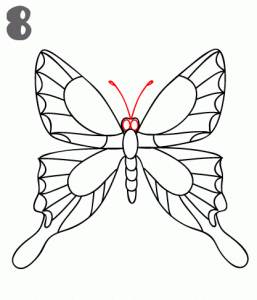
Step 8: Draw the final details to the head and add the antennae.
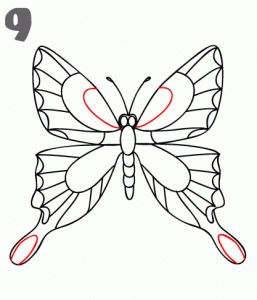
Step 9: Add the final details to the lower wings and upper inner wing and you’ve completed the How To Draw a Butterfly Lesson.
Here’s a 1:20 second video on how to draw a butterfly in 10 steps. Another fun style to try and copy.